It’s been more than a month since my post about the idea of game engine based on Marmalade and IwGame, after the post, spent many hours busy coding, now I’ve got the basic level editor up running, I think it’s pretty cool, so here are some details about it.
Here is a screenshot of the level editor:
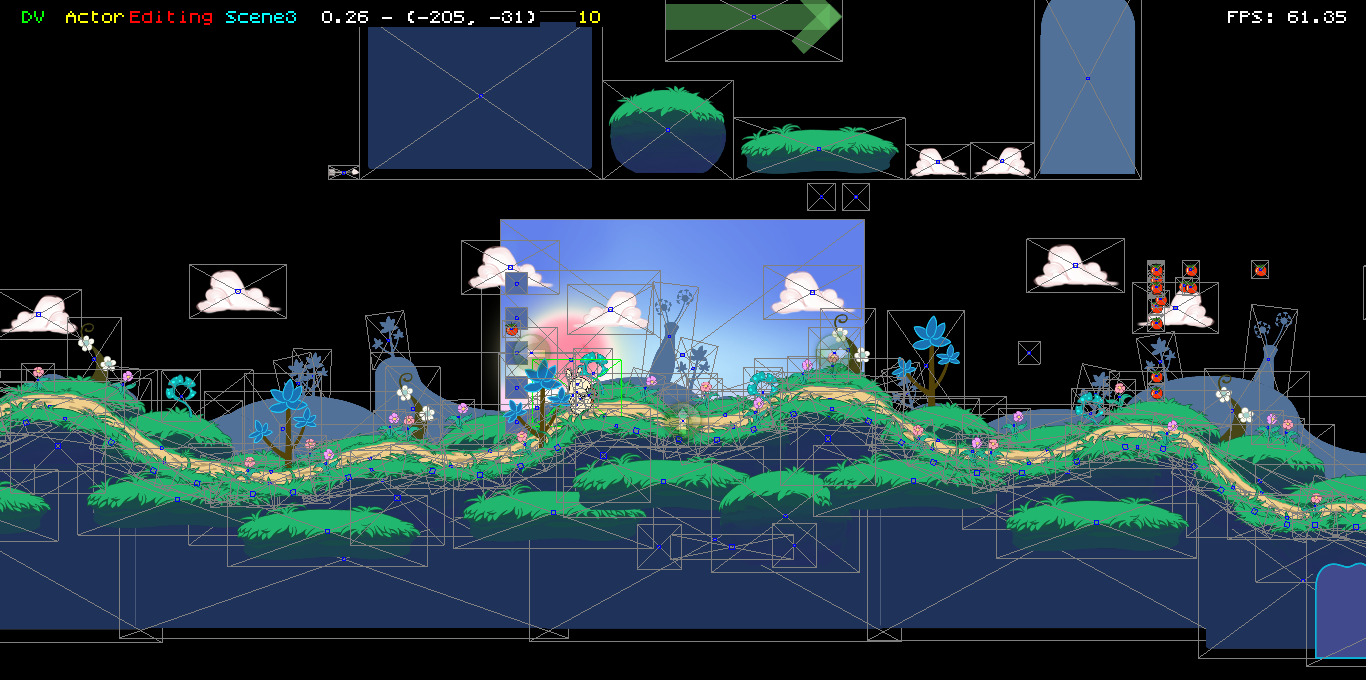
Level Editor Screen Shot 1
Updates about Original Post
Before talking about the level editor, first I want to share some updates about Marmalade and IwGame in the last month.
First, Marmalade 6.1 was released, it’s great for me, the 2 most useful feature for me are: Open GL ES 2.0 shader support in simulator, easy to debug shader now, and OSX deployment to send game/editor as running application to Graphic Artists.
Second, DrMop commented in the original post, assure that IwGame is very actively developed and version 0.40 is about to be released.
Quick test with Chinese characters in CIwGameActorText, it works out of box, just specify a truetype font, write the text in UTF-8, then it’s done. I guess there is no need for CIwGameString to support unicode, since it can pass the bytes to Marmalade correctly.
Current Features
Now back to the level editor, it support image objects with layer(display order), depth(for parallel perspective), users can add/remove/copy/group objects, and can change position/size/scale/angle/origin with mouse, zoom in/out and move the camera around. Also I’ve integrated a Box2D debug view, and you can edit simple shape in it too (boxes and circles).
Actually it’s a bit easier than I thought to implement it, caused me about 5 weeks so far, worked quite hared during the time, but also had a basic animation editor and a game prototype at the same time, so the pure time on it was about 3 weeks.
Our graphic artists have already used the editor to build a few nice scenes and they are getting more productively with it day by day, It’s just what I wished it to be: a tool to make developer and other roles to collaborative more effectively, think it’s at the right direction.
Also it’s extremely useful for prototyping and debugging, the way I did it is to add a few tools around the objects, so when you’re running your game, you can switch to editor mode at any time (by tapping the tab key), then you can check the scene to see what’s going on, or adjust the objects right in the editor, then you can switch back to game mode. It feels like you can freeze time in game at any time, then make changes, then go back, very cool, and very useful.
To make it clear, here is a screenshot of our game prototype:
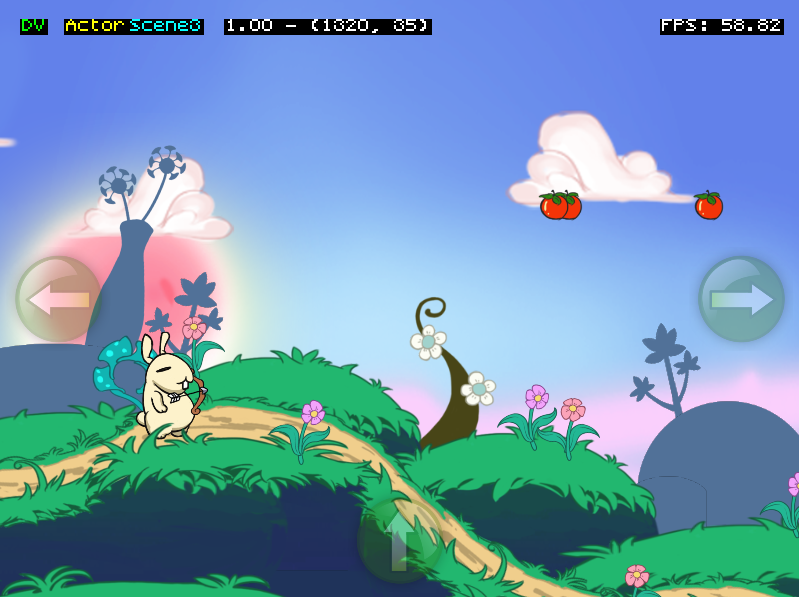
Level Editor Screen Shot 2
After I switch to editor mode, and zoom out a bit, I can get the screen as the first screenshot, then I can adjust the level, and switch back to keep playing. Our graphic artist feels very happy with this in game editing ability, they can see their changes instantly, which make the whole process very efficiently.
Another very useful feature is the Box2D shape editor and debug view, we can create boxes and circles right through the level editor, they will be effective instantly, so for a game based on Box2D, it’s very easy to create the levels by non-programmers.
Here is the same game prototype with Box2D debug view enabled:

Level Editor Screen Shot 3
As you can see, we use boxes and circles to create a rather complicate level. Also it’s very helpful to debug the collisions between objects, e.g. when I was implementing the effect of arrows hitting targets.
What’s Missing
As a basic level editor with advanced features (particle, animations…), I think it’s quite complete and usable, we’ve got quite some prototype scenes with it till now, and the artists feel happy with it most of the time.
The biggest missed feature is undo/redo, only deleting have a quick undo since it can cause big trouble when touch wrong key accidentally. To make it better, all version of saved files are kept on disk, so if you made big mistakes, then it’s recoverable by hand. It’s non trivial to implement a good undo/redo system, so probably this feature will only be added in a much later stage.
Also there is on gui at all, all functions are done by keyboard shortcut and mouse movement, so there is a learning curve, and you’ll feel a bit awkward at first. Though this is the quickest way for implementation and also for actually using IMO, after a few days using it, both of our graphic artists can use it with no big problem, and they said that it’s a bit geeky feeling when using it. :)
And manual works required to create a skeleton scene and import images to it, it’s not hard, just running some python scripts, but it’s still not so simple for non-programmers.
What’s Next
Guess I’ll keep improving it, fixing bugs first, now the focus is character animation editor, and the game prototype. After that, I’ll add particle feature to the level editor.
I feel quite happy doing this kind of tool works, and actually it’s not hard to make it usable as a standalone project and let other people to use it. e.g. I can make a converter to generate cocos builder format, then it can be used in cocos2d projects. Or if I make my animation editor to export spriter’s xml syntax, it can be used in many other projects too.
And at least for myself and our graphic artists, we think that our homebrew tools are much easier to use and feature complete (for just our needs) comparing to the tools we’ve tried. e.g. cocos builder, sprite helper, and spriter. Not saying that my editors are better products, just they are tailored by exactly our need and my design approach, and since it’s integrated in the exact game process, the workflow is much better comparing to a 3rd party tools. Also our level is pretty big(currently the demo scene is about 20000 pixel wide, and the engine/editor can support much bigger usage), I can’t find a proper tool to handle such big scene.
Though making a generic tool will involve many not so interesting works, and it’s very hard to make it works for more people, and probably my tools are just too tailored to our need, so I think I will keep focusing on our games in the near future.
But anyway, I already have some demo scene editor running as OS X application, will make it downloadable in next few days, after I wrote a very basic manual about it. like Jakub commented in the original post, even if I decided to keep it private, it can still help others a bit, and maybe by using it in a experimental way, people can get some ideas about improving their own tools.
If you are interested to see more information about the editor, please leave comments, thanks.
I’ll try to post more about technical details about some aspects of the editors, some hacks I used, and some mistakes I’ve overcomed.